Rotary Table Fixture Plate
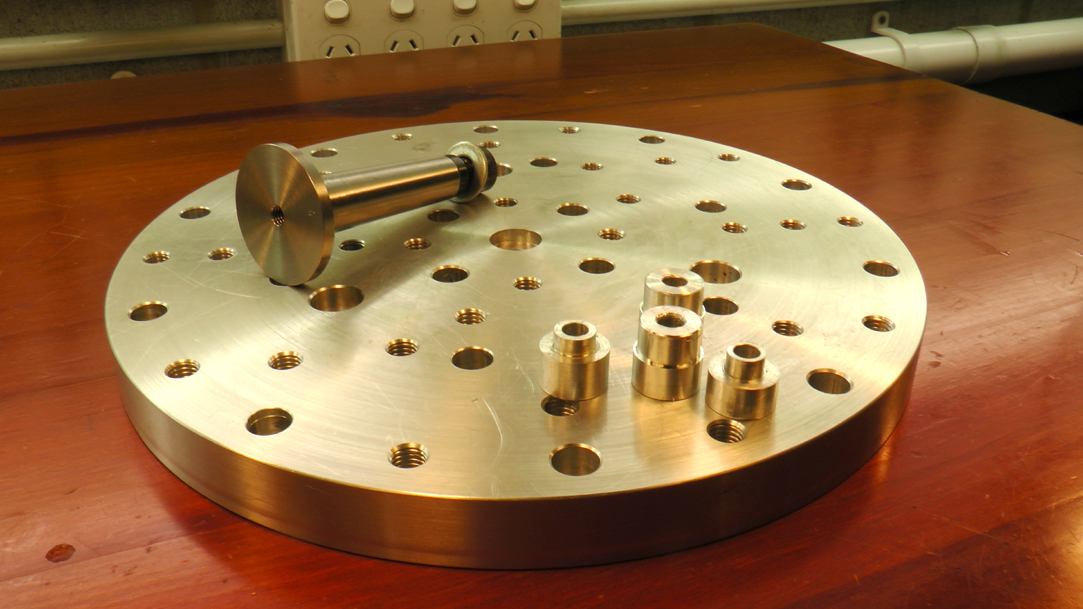 The Sub Table with #2 morse taper locating register, and an assortment of locating spigots.
The Vertex 6" rotary table is incredibly useful in my shop. It's perfect for the size of work that I do, and not too heavy to lift on and off the mill table.
However, I have often found that there is simply not enough room on the table surface to securely and conveniently hold the work. I saw the perfect solution on Frank Ford's site. He calls it a Rotary Table Fixture Plate, and I have pretty much copied his design.
It consists of the fixture plate, a locating spigot with a #2 Morse taper, and an assortment of central spigots, which I'll explain later.
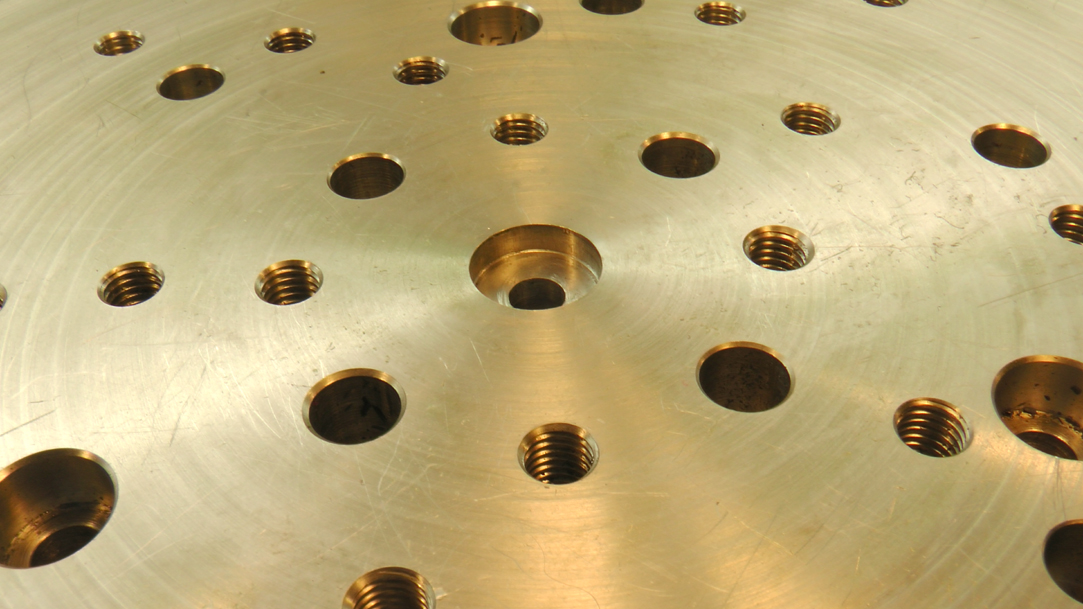 The sub table has an array of threaded M8 holes, and 10mm reamed holes for mounting parts.
My rotary table has a #2 Morse taper in the center, so the locating spigot is designed to seat in that, with the flange section just protruding above the table surface. There is an M8 cap screw and washer at the bottom of the taper, to securely hold it in place within the table.
The Fixture plate has a recess turned on the underside that is a snug fit with the flange, and so ensures that the plate is centered on the axis of the rotary table, when it is placed on top. Once it is seated on the flange, 3 cap screws secure it to the table with standard T-nuts.
The table is made from aluminum alloy, mainly because it is in plentiful supply in my area (yet good quality steel is non existent).
The surface has been tapped with a set of M8 threaded holes for my Clamping and Workholding Kit, and a set of M10 reamed holes to accept 10mm dowel pins. This means there are plenty of hold down options available, and the dowel pins can be placed wherever required to restrict rotational movement.
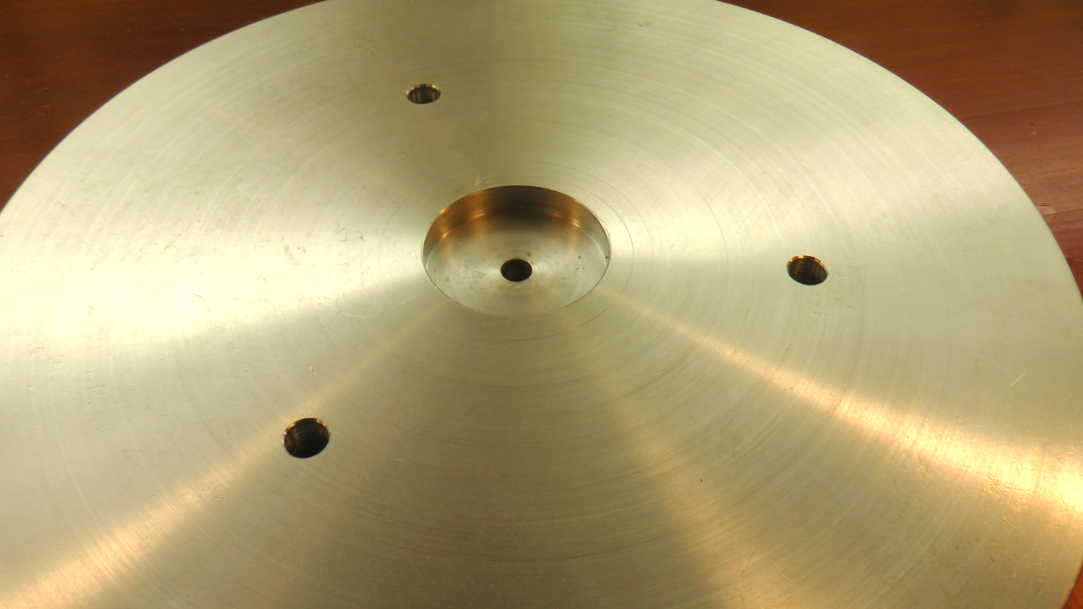
A view of the underside of the plate. The larger recess in the middle is turned as a snug fit to the flange on the #2 Morse taper locating register.
|
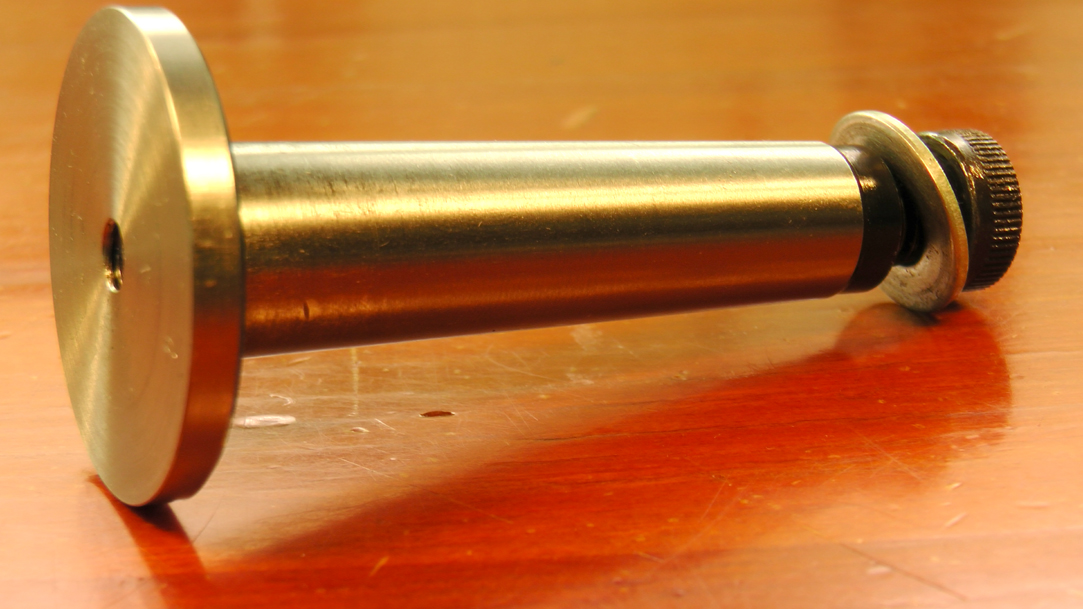
The #2 Morse taper locating register, with a threaded hole through the center.
|
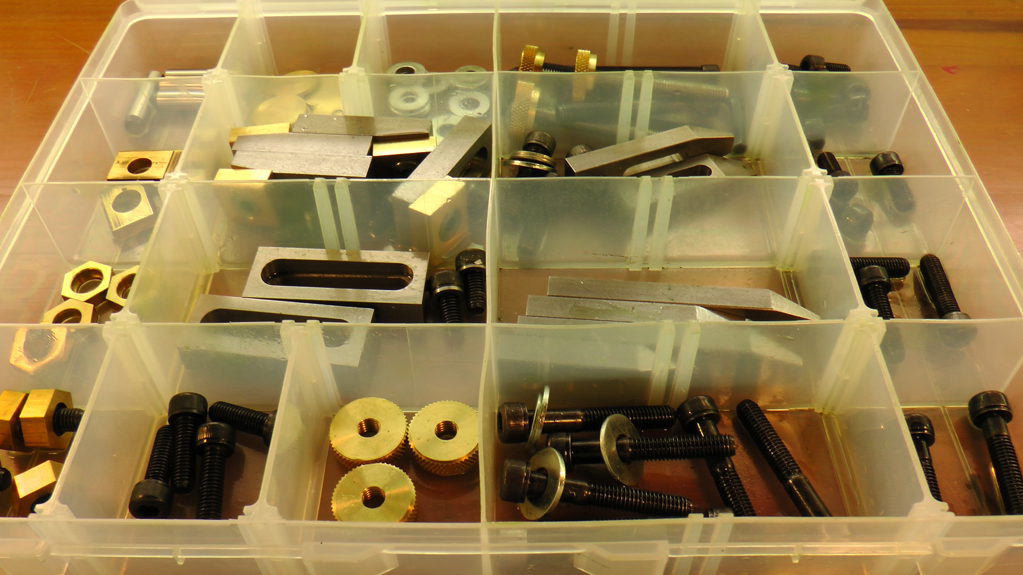
Shop made Clamping and Holding Kit, with a number of different holding options.
|
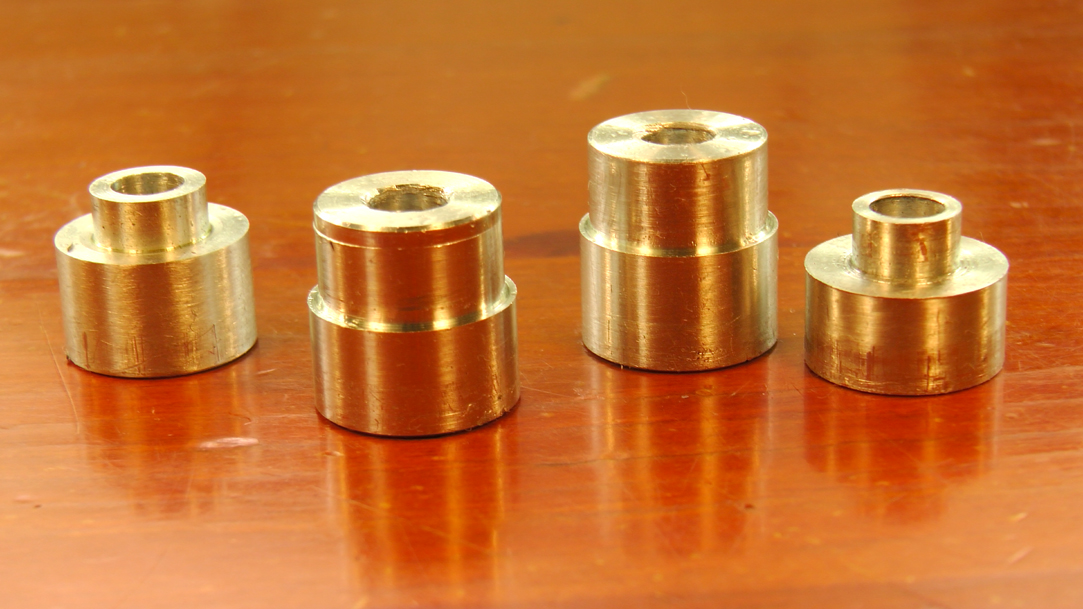 Locating Spigots, turned on the lathe as required for a given part.
Now about those central spigots I mentioned...
As often as not, the part being made will have a central hole, around which a curve is being concentrically milled. These spigots can be turned up on the lathe as required to sit snugly in the top recess, and also within the part, locating the part perfectly on the rotary table table central axis. There is an M6 thread running down the center of the Morse taper register, that gives the option of clamping the part from above. Additional clamping can also be brought to bear as required using the rest of the table holes.
You can see this in action at about the 3 minute 30 mark in the video below.
This is an absolute must have item for the shop, and I regularly think to myself: "This part would be a real pain to hold if I hadn't made this fixture plate". It took a couple of days to build, but it was time very well spent.
