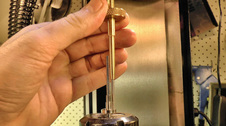
Tap And Drill Extenders
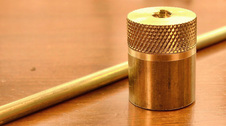
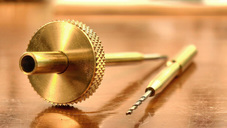
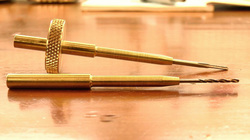
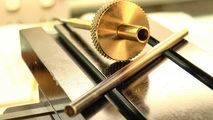
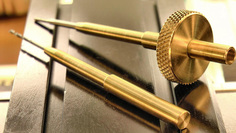 10 BA Drill and Tap Extender set.
Clocks have some really awkward parts that sometimes present a real challenge to access with a cutting tool.
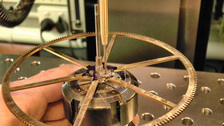
Take center wheel collets for example. (the little flange shape that is fixed onto the arbor, that acts as a mounting point/register for the wheel)
I'm generalising here, but this collet tends to be located around the middle of its arbor length, due to the arbors special role of driving the minute hand. The minute hand needs something to fit on, and so that means more arbor hanging off the end to protrude out past the front pivot. More arbor means a longer tap and drill will be required to access the collet to put in the necessary fastening holes, if it is already attached to the arbor. But of course who has a tap and drill that is long enough? Certainly not me.
One way around this problem is to simply drill and tap the holes before fastening the collet to the arbor. This is a reasonable thing to do, but if you really want a concentric seating for your wheel, then you're going to fasten the collet to the arbor first, and then turn the seating between centers before drilling and tapping. In this case, you need that extra reach when it comes time to drill and tap for the wheel fasteners.
So what to do?
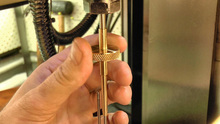
John Wilding's suggestion is to make an extension for the drill and tap, so that they can reach down that extra distance. Both extenders simply mount into the drill chuck (or ER collet chuck) and reach past the end of the arbor. They both need to be quite thin to remain clear of the arbor and front pivot, and of course need to be quite true.
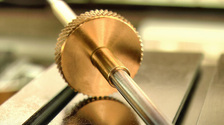
Starting with some brass leftovers from the scrap drawer, I've turned two slender holders for the drill and tap, as well as a nice thumbwheel to control the tap whilst threading. The thumbwheel is fastened in place with loctite 603, and the tap extender is drilled out to match a rod that guides the tapping action from above.
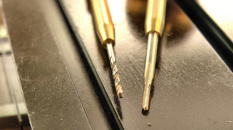
The screw fasteners I am using for this particular clock's wheel work are size 10BA, so what you see here is a 10BA tap and drill. Both are held in place with loctite 603. I have every intention of leaving these two in place permanently, but if I need to I can easily break the bond with a little heat.
One thing that close up filming of my machining has shown me is the amount of error that the operator (me!) can introduce into the machining process, by pushing too hard on the cutting tool. Due to its rotation of the work, a lathe has a natural tendency to center a drill. So drilling on the lathe is probably the most accurate way to get a hole where you want it. However it is very easy to put too much muscle behind the tailstock, flex the bit as it is going in, and overpower that natural centering tendency. Watching the result of this on camera is very illuminating - especially at 20x magnification, where there's nowhere to hide! It is quite apparent that the drill flexes under too much pressure, and bows ever so slightly sending the drill aiming point off center. A drill that was cutting true, suddenly develops an eccentric orbit. It is quite remarkable to watch. The result is a hole that is off center, and a trashed part.
A gentle pressure on the other hand (and I do mean gentle, especially for really thin bits and deep holes like this) lets the tip cut before bowing. So it is much more inclined to stay on the center line. Regular clearing of chips is also required, if the hole is a deep one like this.
So taking my own advice, I gently drilled out the holes to accept the drill and tap, and cleared the chips often. Fortunately the result was quite good. Using an ER 16 collet chuck to hold it for both machining and drilling, the runout at the drill tip is just over a thousandth of an inch, which is a lot better than I expected.
This is an essential little tool for the job of drilling and tapping a center collet that is already fixed to its arbor, and a really fun afternoon project. Best of all, I managed to take something out of the scrap drawer for a change, instead of always putting something in!
Watch out for this tool to pop up in an upcoming video, when I make the collets and arbors for the current clock build.
Thanks for dropping by,
Chris.
